inquiry
Leave Your Message

How to Choose the Right Dimmer Light for Your Project?

Choosing the right Dimmer Light begins with more than matching brightness to a room. It requires careful attention to energy use, control compatibility, load type, and visual comfort. The International Energy Agency reports that lighting consumes about 15% of global electricity. That figure makes every lighting decision meaningful, even in a small renovation.

The U.S. Department of Energy states that LED lamps use at least 75% less energy than traditional incandescent lamps. However, lower consumption does not guarantee smooth dimming. An LED fixture may flicker, buzz, or stop dimming correctly when paired with an incompatible controller. I have seen this problem in rooms where a dimmer worked perfectly with one lamp, then failed after a seemingly minor replacement. Small details matter.

A reliable selection process should examine the fixture’s wattage range, dimmer technology, driver design, and control method. Check whether the product carries recognized safety certifications. Look for tested compatibility lists from manufacturers or independent programs such as ENERGY STAR. The National Electrical Manufacturers Association also emphasizes proper compatibility between control devices and lighting loads in its industry guidance.

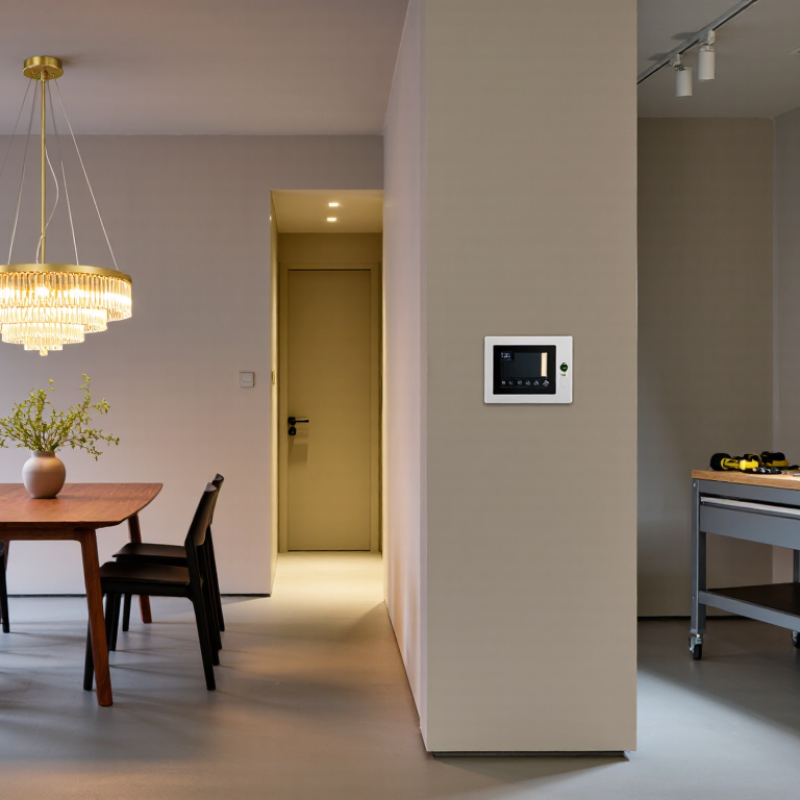
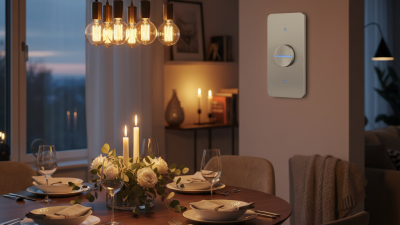
Consider the space itself. A dining room may need warm, gradual fading, while a workshop may require stable, brighter output. Smart controls add convenience, but they can introduce network dependence and setup errors. Not every advanced feature is useful.

A perfect choice is unlikely.

The best Dimmer Light balances performance, safety, efficiency, and everyday usability. This guide explains how to evaluate those factors before installation, while acknowledging that real-world results can differ from laboratory claims.
How to Choose the Right Dimmer Light for Your Project?

Define Your Project’s Lighting and Dimming Requirements

How to Choose the Right Dimmer Light for Your Project?

Begin by defining the space, activities, and lighting expectations. A bedroom may need soft, low-level light for evening use. A kitchen worktop needs brighter, clearer illumination for safe preparation. Measure the room size and note existing fixture positions. Record the desired brightness, color temperature, and operating hours. Do not choose a dimmer by appearance alone. The electrical load matters.

The dimmer must match the light source and its total wattage. Check whether the fixture requires a specific dimming method, such as phase control or a low-voltage controller. Confirm the minimum and maximum load range. Some LED lamps flicker when the load is too low. Others may hum during adjustment. I once selected a control based only on maximum wattage. The lights still performed poorly. That mistake showed me why compatibility testing matters. Control style also affects daily use. A wall control suits fixed rooms, while a handheld or automated option may serve flexible spaces better.

Tips: Write down every fixture’s wattage before shopping. Test one light with the proposed dimmer when possible. Check smooth operation from minimum to maximum brightness. Leave room for future changes, because lighting plans often evolve. If wiring or load calculations seem unclear, ask a qualified electrician to verify the installation.
How to Choose the Right Dimmer Light for Your Project?

Define Your Project’s Lighting and Dimming Requirements

Start by identifying the maintained illuminance required for each space. Common planning levels include approximately 100 lux for corridors, 300 lux for classrooms and retail areas, and 500 lux for offices and conference rooms. After defining the target level, confirm the dimmer’s load type, minimum dimming level, control method, and compatibility with the selected LED driver. Actual requirements should be verified against the applicable local lighting standard and the project’s visual-task needs.

Compare Dimmer Types and Load Compatibility

Choosing the right dimmer starts with the load, not the wall plate. Incandescent and halogen lamps usually work with leading-edge phase-cut dimmers. Many LED lamps perform better with trailing-edge dimmers, which can reduce buzzing and uneven brightness. Some universal dimmers support both methods, but compatibility still depends on the lamp’s driver.

Check the lamp label carefully. It must state that the lamp is dimmable. Then compare its wattage with the dimmer’s minimum and maximum load ratings. A single 8-watt LED may fall below the minimum load, causing flicker, delayed starting, or sudden shutoff. Several matching lamps can solve this issue, though adding lamps only to meet a rating is not ideal. Low-voltage systems need extra attention. Magnetic transformers generally require a different dimmer type from electronic transformers. Never assume they are interchangeable.

Control systems create another difference. A 0–10 V dimmer sends a control signal to compatible drivers, while digital systems require matching communication equipment. These options suit larger installations, but they add wiring and setup demands. I once underestimated how much a dimmer’s minimum load affected a small room, and the lights pulsed visibly at low brightness. That mistake was avoidable. Read the technical sheet, confirm the wiring method, and test the lowest brightness level before final installation. Local electrical rules may also require qualified installation and specific enclosure standards.

How to Choose the Right Dimmer Light for Your Project? - Compare Dimmer Types and Load Compatibility

Dimmer Type Control Method Compatible Load Types Typical Dimming Range Key Advantages Main Limitations Best-Fit Applications
Leading-Edge
(Forward-Phase)
Cuts the beginning of each AC voltage half-cycle, commonly using TRIAC or SCR technology. Best: Incandescent and halogen lamps.
Compatible with many magnetic low-voltage transformers and only with LED or CFL products specifically marked as leading-edge dimmable.
Usually from the manufacturer’s minimum level to 100%; the usable minimum varies by lamp and driver. Simple, widely available, and generally effective for resistive loads. May create audible hum, inrush stress, flicker, or poor low-level performance with incompatible LED drivers. Often has a higher minimum load requirement. Residential retrofit projects, incandescent fixtures, halogen downlights, and magnetic low-voltage systems.
Trailing-Edge
(Reverse-Phase)
Cuts the end of each AC voltage half-cycle, commonly using electronic switching devices. Best: Dimmable LED drivers and electronic low-voltage transformers.
Also suitable for many incandescent and halogen loads when permitted by the dimmer rating.
Often supports smoother low-level dimming than leading-edge control, but the exact range depends on the connected driver. Typically quieter and better suited to modern LED loads; can reduce some transformer noise and electrical stress. Not suitable for every transformer or lamp. The driver must be rated for reverse-phase operation, and the dimmer may require a neutral connection. LED lighting upgrades, architectural lighting, hospitality spaces, and electronic low-voltage installations.
Universal Phase-Cut Automatically selects leading-edge or trailing-edge operation, or allows manual selection. Can support incandescent, halogen, magnetic low-voltage, electronic low-voltage, and selected dimmable LED loads, subject to the product rating. Depends on the selected phase mode and the connected load; LED performance should be verified through testing. Flexible for mixed projects and reduces the need to stock separate phase-cut dimmers. “Universal” does not guarantee compatibility with every LED driver. Mixed-load circuits can still produce flicker or uneven dimming. Renovations, multi-load projects, replacement work, and installations where the final lamp type may change.
0–10 V A separate low-voltage control signal sets the light level: approximately 10 V commonly represents full output and approximately 0 V the minimum control level. LED drivers, fluorescent ballasts, and other luminaires equipped with a compatible 0–10 V control input. Commonly designed for a nominal 1–100% control signal, but the fixture and driver determine the actual minimum light output. Reliable continuous control, straightforward integration with sensors and building-control systems, and good suitability for commercial spaces. Requires compatible control wiring in addition to line-voltage wiring. Different 0–10 V implementations and sinking-current requirements must be checked. Offices, schools, retail areas, warehouses, and commercial lighting-control systems.
DALI / DALI-2 Digital two-wire communication sends individual or grouped commands to addressable LED drivers and control devices. LED drivers and control gear that explicitly support DALI or DALI-2 communication. Typically supports digitally commanded levels down to the driver’s specified minimum; exact performance depends on the control gear. Addressable fixtures, two-way status feedback, scenes, grouping, scheduling, and scalable control. Requires compatible digital drivers, bus wiring, commissioning, and a suitable control system. It is not a direct replacement for a standard phase-cut wall dimmer. Large commercial buildings, hotels, healthcare facilities, offices, and sophisticated lighting-management systems.
PWM / Low-Voltage DC Rapidly switches a low-voltage DC supply to regulate the duty cycle delivered to LED modules or strips. Constant-voltage LED strips and modules designed for PWM control, commonly at 12 V or 24 V DC. Often provides a broad control range, but the minimum visible output depends on the LED module, controller, and power supply. Effective for LED strips, preserves color consistency better than reducing voltage directly, and supports multiple control interfaces. Requires a correctly sized DC power supply and controller. It must not be connected directly to line voltage or to constant-current loads unless specifically designed for them. Cove lighting, signage, cabinets, display cases, furniture lighting, and decorative low-voltage LED installations.
Plug-In / Cord-Connected Controls a receptacle-connected lamp through a plug-in module, rotary control, touch control, or wireless interface. Dimmable table and floor lamps using compatible incandescent, halogen, or dimmable LED lamps. The module’s load rating must match the lamp. Varies by model and lamp; dimmable LED lamps may have a narrower practical range than incandescent lamps. Fast installation without rewiring a wall box; useful for temporary or movable lighting. Not intended for permanently wired fixtures unless specifically approved. Non-dimmable lamps and motors may be unsafe or operate improperly. Portable lamps, temporary installations, rental properties, showrooms, and retrofit applications without wall-box access.
Smart / Wireless Dimmer Local controls, wireless commands, schedules, scenes, sensors, or automation platforms operate a compatible dimming circuit. Depends on the selected switching method: phase-cut LED loads, 0–10 V drivers, or other loads supported by the control device. Determined by the underlying dimming technology and the connected driver or lamp. Remote control, automation, occupancy integration, energy scheduling, and scene management. Network, neutral-wire, hub, load-type, and minimum-load requirements vary. Wireless compatibility does not automatically mean lamp compatibility. Homes, guest rooms, meeting spaces, restaurants, and projects requiring remote or automated control.
Selection rule: Confirm the dimmer’s rated voltage, maximum and minimum load, load type, phase mode, neutral-wire requirement, and compatibility list. For LED projects, the dimmer and LED driver should be tested together because rated wattage alone does not guarantee flicker-free or full-range dimming.

Check Voltage, Wattage, and Wiring Specifications

How to Choose the Right Dimmer Light for Your Project?

Check Voltage, Wattage, and Wiring Specifications

Before choosing a dimmer, confirm the circuit voltage at the wall box. Most residential systems use standard household voltage, but older or specialized circuits may differ. The dimmer’s voltage rating must match the supply. Never rely on appearance alone. Read the electrical label.

Wattage is equally important. Add the wattage of every connected lamp, then compare the total with the dimmer’s rated range. LED lamps often draw less power, but their starting load can still cause flicker. Check the minimum load rating, not only the maximum. Leave some capacity unused. Heat builds inside crowded wall boxes.

Wiring can decide whether a dimmer works safely. Identify single-pole, two-location, and multi-location circuits before disconnecting anything. Some dimmers need a neutral wire, while older boxes may not provide one. Check for grounding, wire condition, and box depth. A shallow metal box can make installation awkward. Turn off the breaker and verify the wires with a tester. Small details matter.

A practical mistake is assuming every dimmable lamp behaves the same way. They do not. If the lights buzz, flicker, or fail to switch off fully, the load and dimmer may not cooperate. I still recheck the specifications when a setup seems simple. When wiring is unclear, consult a qualified electrician.

Evaluate Controls, Features, and Installation Options

Choosing the right dimmer light begins with the room’s lighting load. A kitchen with six LED downlights needs different control performance than a bedroom with one pendant. Check the fixture’s wattage, dimming method, and compatibility before buying. Measure, do not guess. Many LED lamps require a minimum load, while older dimmers may cause flicker, buzzing, or a narrow brightness range.

Controls should match daily use. A basic rotary control suits a simple room, but push-button, touch, motion-sensing, or app-based options may improve convenience. For layered lighting, consider separate controls for task, accent, and ambient fixtures. A soft-start feature can reduce sudden glare, especially in bedrooms and hallways. Scene settings are useful, though they can feel excessive in a small space. I have found that simpler controls are often used more consistently.

Installation details can change the entire project. Confirm whether the wall box has a neutral wire, enough depth, and compatible wiring for multi-way control. Wireless models can reduce wall damage, but batteries require regular attention. Wired systems usually provide steadier performance. Turn off power at the breaker, verify the circuit, and follow local electrical requirements. When wiring is uncertain, use a qualified electrician. After installation, test low and high brightness levels for several minutes. Look for heat, flicker, delay, or unwanted noise. A dimmer that works perfectly for ten minutes may still perform poorly at night.

Select a Safe, Efficient, and Future-Proof Dimmer Light

How to Choose the Right Dimmer Light for Your Project?

Select a Safe, Efficient, and Future-Proof Dimmer Light

A dimmer should match the lamp, driver, wiring, and expected load. I have seen LED fixtures buzz when paired with unsuitable phase-cut controls. Some also flicker near their lowest setting. Test it first. Check the manufacturer’s minimum and maximum load ratings, not only the wattage printed on the box. LED loads can behave differently from older incandescent loads, even at low power. A qualified electrician should verify grounding, enclosure space, heat dissipation, and local installation requirements.

Efficiency deserves equal attention. The International Energy Agency reports that lighting uses roughly 15% of global electricity consumption. The U.S. Department of Energy states that LED lighting can use at least 75% less energy and last up to 25 times longer than incandescent lighting. Dimming can reduce energy use further, but savings depend on actual operating levels. A rarely dimmed installation may deliver less benefit than expected. That detail is easy to overlook.

For future upgrades, choose a dimmer supporting widely used control methods, such as phase-cut, 0–10V, or digital control, when appropriate. Confirm compatibility with sensors and automation systems before installation. Check for smooth low-end performance, audible noise, visible flicker, and a reliable memory function. Flicker matters. The IEEE 1789 guidance connects certain modulation patterns with potential health concerns, so stable light output is worth checking. Keep the specification sheet and test one circuit before ordering in volume. My own judgment can be imperfect; real rooms often expose problems that laboratory figures miss.